Pages

Monday, December 22, 2014

Hot Cocoa Bar


Christmas is just around the corner and I'm sure almost everyone has a few more holiday parties to attend or host.  Last week I shared some of my new favorite party appetizers and this week I thought we could all use something sweet and super simple to make.  


A hot cocoa bar is the perfect way to really get into the Christmas spirit and if your Elf on the Shelf is running out of ideas here's something that the whole family can enjoy.  All you need is a great hot cocoa recipe, some whipped cream, cookies to dip and a few fun toppings.  Oh, and don't forget your PJ's and a good movie.  Also, if you haven't checked out Conflicted Pixie's Little Play Furniture you definitely should!  Her beautifully handmade play tents make a wonderful gift and would be the perfect place for your little ones to enjoy their hot cocoa and cookies!


So whether you are hosting a fancy holiday fete or needing some quiet quality family time a little hot cocoa will be sure to keep everyone warm during this holiday season!


Gingersnap S'mores 


Ingredients
40 small gingersnap cookies (I use Trader Joe's triple ginger cookies)
60 mini marshmallows
6-8 ounces chocolate chips
1-1/2 teaspoons vegetable shortening

Preheat the oven to broil.

Place 20 gingersnap cookies, flat side up, on a parchment paper lined baking sheet.  Place 3 mini marshmallow on top of each cookie.  Place in the oven under the broiler for about 1 minute.  Watch the marshmallows carefully so that they don't burn.  It only takes a few seconds for them to go from golden brown to burnt.  Remove the cookies from the oven and top with the remaining 20 cookies, gently pressing down to seal.

Place the chocolate chips and shortening in a double broiler or a heat proof bowl over a sauce pan filled with water over medium heat.  Stir chocolate and shortening until completely melted and smooth.  Remove from the burner.  Carefully dip the cookies halfway into the chocolate and return them to the parchment paper lined baking sheet.  Place the cookies in the refrigerator for about 25 minutes to set the chocolate.  Serve immediately or store in an airtight container for up to 3 days.  Makes 20 cookies.

Peppermint Marshmallow Pops


Ingredients 
10 candy canes, tops removed
10 marshmallows
6-8 ounces chocolate chips
1-1/2 teaspoons vegetable shortening
1/4 cup red sprinkles or crushed candy canes

Place the chocolate chips and shortening in a double broiler or a heat proof bowl over a sauce pan filled with water over medium heat.  Stir chocolate and and shortening until completely melted and smooth.  Remove from the burner.  Carefully dip the marshmallows halfway into the chocolate then into the sprinkles or crushed candy canes.  Place the marshmallow pops on a parchment paper lined baking sheet and place in the refrigerator for about 25 minutes allowing the chocolate to set.  Insert candy canes into the center to the marshmallows. Enjoy immediately or store in an airtight container for up to 2 days.  Makes 10 pops.  


Hot Cocoa Bar Extras

Peanut Butter Cup and Rolo pops
Candy Canes
Whipped cream
Caramel sauce
Cinnamon sticks
Chocolate Jimmys
Adults only: Bailey's, Kahlua, or Frangellico


Friday, December 12, 2014

Holiday Parties: Food And Fashion On A Budget

I can't tell you how excited I am to be collaborating again this holiday season with my dear friend Erica from Conflicted Pixie.  Last year we brought you the best of New Year's Eve and this year we present to you holiday parties on a budget!


Erica is the queen of budget-friendly everything!  I don't ever miss a blog post from her so that I can stay on top of the latest trends and also for the best deals out there!  Staying within a budget when it comes to food however is often difficult for me.  I admit I am a sucker for a really good creamy, stinky and expensive cheese.  However, this holiday season (after I nearly spent my savings on airline tickets for Christmas) I am all about keeping it simple and inexpensive.


Holiday parties can still be festive and creative without being over done and complicated.  I personally love small plates, finger foods and sharing.  Serving your party tapas style can keep you from preparing a big meal, out of the kitchen and enjoying that glass of wine with your guests.


I have created some tapas plates with a holiday twist that won't leave your pockets empty.  All three recipes cost me under $50 to make, herbs, spices and condiments included!  Consider serving wine and beer instead of a fancy cocktail to keep things simple and cost effective.  I've paired one of my favorite Spanish wines that I purchased for under $15 and Greg has suggested to try a great pilsner like this one!  


Now, what to wear to this festive tapas holiday party?  Check out Erica's amazing budget-friendly Lookbook (Did I mention she's a personal stylist for Keaton Row and it's free to have her style you?) created just for you (and me)!

Cheers and Happy Holidays!!


Maple Thyme Barbecue Meatballs

Ingredients
1-1/2 lb ground beef
2 cloves garlic, minced
1/2 cup red onion, finely chopped
1/2 teaspoon salt
1/4 teaspoon pepper
1/4 teaspoon cayenne pepper
2 tablespoon olive oil
1 cup ketchup
1/2 cup brown sugar
1/2 cup maple syrup
2 teaspoons lemon juice
2 teaspoons Worcestershire sauce
2 tablespoons plus 1 teaspoon fresh thyme leaves, chopped


Over medium heat in a large sauce pan, combine the ketchup, brown sugar, maple syrup, lemon juice, Worcestershire sauce and 2 tablespoons of fresh thyme.  Stir until the sugar has melted.  Continue cooking until the sauce comes to a low boil.  Reduce the heat to low, cover and allow to simmer for 10 minutes.  Remove from the burner and set aside.

In a large mixing bowl combine the ground beef, garlic and onions.  Add the salt, pepper, cayenne pepper and 1 tablespoon olive oil.  Stir to combine.  Roll the mixture into 1 inch balls.

In a large cast iron or non stick pan heat 1 tablespoon of olive oil over medium high heat.  Place the meatballs in the pan and cook for 1-2 minutes on all sides .  The meatballs should be about a medium rare.  Remove the meatballs from the pan and place in the pan with the maple thyme barbecue sauce.  Simmer the meatballs and sauce over low heat for about 10 minutes.  Serve hot and garnish with remaining teaspoon of fresh thyme.  Makes 25-30 meatballs.

Note:  To keep the meatballs warm during a party, place them in a small crock pot on the warm setting.


Chipotle Goat Cheese Stuffed Baby Bell Peppers


Ingredients
10 baby bell peppers
8 ounces soft goat cheese, room temperature
1 chipotle pepper in adobo sauce, roughly chopped
1 bulb garlic, roasted
Ground black pepper to taste

1 tablespoons chives, chopped

In a small food processor combine the goat cheese, chipotle pepper and roasted garlic.  Season with ground black pepper if desired and pulse to combine.

Cut each baby bell pepper into thirds or quarters depending on the size of the pepper.  Remove the seeds and membranes and discard.  Fill each sliced bell pepper with the chipotle goat cheese.  Garnish with the chives and serve.  Makes 30-35.


Holiday "Stuffing" Empanadas


Ingredients
2 puff pastry sheets, thawed
1 tablespoon butter
1 tablespoon olive oil
2 cups crimini mushrooms, finely chopped
1 cup celery, finely chopped
1/2 cup onion, finely chopped

1/4 cup fennel, finely chopped
1/2 teaspoon fresh marjoram, chopped
1 tablespoon fresh rosemary, chopped
1 tablespoon fresh thyme leaves, chopped
Salt to taste
Pepper to taste
1 egg, beaten
1 tablespoon flour


Preheat the oven to 400 degrees.

Over medium heat in a large pan, heat the olive oil.  Add the butter and melt.  Add the onions and cook until translucent about 3-5 minutes.  Add the mushrooms, fennel and celery.  Cook for about 7-10 minutes, occasionally stirring.  Add the marjoram, rosemary and thyme.  Stir to combine and cook for another 2-3 minutes.  Season with salt and pepper.  Remove from the heat and allow to slightly cool.

Place the puff pastry on a slightly floured surface.  Flour the top of the dough and roll out the puff pastry until about 1/16 inch thick.  Using a 4 inch round cookie cutter cut circles out of the pastry.

Place 1 tablespoon of the vegetable mixture in the center of the cut pastry.    Brush the edges with the egg wash and fold the pastry in half making a half circle.  Gently pinch the ends together.  Using a fork press down along the edges sealing the empanadas together.  Repeat this until all the pastry is used.  Brush the tops of the empanadas with the egg wash.

Place the empanadas on a parchment paper lined baking sheet and bake in the oven for 20-25 minutes, until golden brown.  Remove from the oven and allow to slightly cool.  Serve with your favorite gravy recipe.  If you need one, here's Greg's favorite.  Makes 12-16.


Monday, December 1, 2014

Merry, Jolly, and Buzzed

December is here and it is finally time to break out the Christmas decorations, sing carols loudly throughout the house and start sipping on some festive drinks! This cocktail includes some of my favorite things; cinnamon, cranberries and the most wonderful of all...TEQUILA!  So be merry and get stirring!  Happy Holiday Season!!

Christmas Cranberry Margarita

Ingredients 
2 ounces resposado tequila
1/2 ounce cranberry simple syrup (see recipe below)
1/2 lime, juiced
Soda water
1 teaspoon sugar
1/8 teaspoon (or to taste) cinnamon
Sea salt to taste
Ice
3 fresh cranberries for garnish

Cranberry Simple Syrup

Ingredients
1 cup water
1 cup sugar (I use organic coconut sugar)
6-8 ounces fresh cranberries

In a medium saucepan combine all of the ingredients over medium-high heat.  Stir until the sugar has dissolved.  Bring to a low boil.  Reduce the heat to low and simmer for 20 minutes, stir intermittently.  Using the back of a spoon or a potato masher, break up the cranberries.  Strain into an airtight container and allow to cool.  You can either discard the cranberries or save them for a later use (I spread it on my toast with cream cheese).  Store in the refrigerator for up to 2 weeks.  


Assembling the Cocktail:

On a small plate combine the sugar and cinnamon.  Sprinkle with sea salt if desired.  Use a lime wedge to moisten the rim of a rocks glass.  Dip the glass into the mixture coating the rim of the glass.  Fill the glass with ice.  Add the Tequila, cranberry syrup and lime juice.  Top with soda water and stir to combine.  Garnish with cranberries.  Makes 1 cocktail.

Need to make a big batch?

In a large pitcher combine 3 cups of tequila, 1 cup of the cranberry simple syrup, and the juice from 6 limes.  Rim each glass with the cinnamon sugar mix and fill with ice.  Fill each glass about halfway with the tequila cranberry mixture and top with soda water.  Garnish with fresh cranberry skewers.  Serves 12.  


Sunday, November 23, 2014

Saturday, November 15, 2014

FriendsGiving


The picture above says it all and can be interpreted in so many ways.  Running to get that last piece of pumpkin pie, the joy of escaping the crazy family gathering, skipping because the bourbon cocktails were amazing, or simply friends truly enjoying the fact that they are family.  


Eleven years ago when I moved to Los Angeles I knew that my new found friends would be very important to me, however I could have never dreamed to what an amazing family they would become.  We have seen each other through new jobs, dance till your feet hurt-yes you will have a hangover-wedding, adventures in parenting, bad relationships, coping with the in-laws and celebrating all the little things in between with really good bourbon.  Being thankful for my friends is an understatement and my dear friend Courtney from Creative Ever After is no exception.


I was fortunate enough to collaborate with her as we created our tablescape for what could be a pretty fantastic "friendsgiving."  Courtney is pretty much Martha Stewart in my book when it comes to her DIY crafts.  These DIY Succulent Pumpkin Centerpieces are the most perfect touch to anyone's Thanksgiving decor.  They are simple, elegant and easy to make.  And how cute is the delicata squash one!!


The "Give Thanks" place cards are so super cute and I love the special touch of the back side where you can write what you are thankful for.  I admit I don't often like to share my feelings out loud.  So going around the table and saying what we are thankful for is just short of a nightmare for me.  However, I really love the idea of writing them down and placing them so everyone else can read.  


Now about that soup.  Kabocha squash, also known as Japanese pumpkin, is sweeter than a sugar pie pumpkin and a bit less than a sweet potato.  Roasted with some garlic and leeks it ends up being a wonderful pair to the salty spicy crispy chorizo.  The coconut milk gives the soup a warm creamy taste keeping it lighter opposed to using heavy cream.  A small bowl of this soup to start your Thanksgiving meal will get everyone at the table ready for a feast full of fall flavors.


Courtney and I enjoyed the soup and wine after we finished shooting pictures for the post admiring the table and talked about how someday we would host a Thanksgiving like this.  I always wanted to have the kind of Thanksgiving where I serve courses; appetizers and wine, soup, salad, entrees with all the fixings, more wine and then pie.  I love the idea of really making it an event and enjoying each course separately, but for now Courtney and I can dream.  Maybe the next Friendsgiving.


Roasted Kabocha Squash Soup with Crispy Chorizo


Ingredients

2 Kabocha squashs
2 heads garlic
3 medium leeks, white and light green parts only, chopped
4-1/2 cups chicken or vegetable broth
4 chorizo links, casing removed
1-1/2 cups coconut milk
4 tablespoons plus 1 teaspoon olive oil
2 tablespoons unsalted butter
Salt and pepper to taste

Preheat the oven to 375 degrees.

Carefully cut the squashes in half.  Remove the seeds and stringy flesh and discard.  Drizzle 2 tablespoons of olive oil over the pumpkin and rub into the flesh and skin.  Place the squash onto a large foil lined rimmed baking sheet flesh side down.  Bake in the oven for 55-60 minutes, until the squash is tender enough for a fork to go through.

Remove the flaky skin of the garlic heads.  Cut off the tops and discard.  Place the garlic heads on a piece of foil and drizzle with 1 teaspoon of olive oil.  Wrap the foil around the garlic and place in the oven with the squash when the squash has 30 minutes remaining.  Roast for 30 minutes.  Remove the squash and garlic from the oven and allow to cool enough to handle.

In a large skillet over medium-high heat, cook the chorizo until browned and crispy.  Use a fork or spatula to break the links into small pieces.  Cover and set aside.

In a large pot or dutch oven melt the butter and 2 tablespoons of olive oil over medium heat.  Add the leeks and cook for about 5-7 minutes, until they color and are tender.  Scoop 4 cups of the roasted squash out of the skin and add to the leeks.  Remove the roasted garlic from the skins and add to the squash mixture.  Stir to combine.  Add 2 cups of the chicken or vegetable broth.  Stir to combine.  Bring the soup to a boil.  Reduce the heat to low and simmer for 10 minutes.  Using and immersion blender, blend the soup until smooth.  You can also puree the soup in a food processor in batches and return to the pot.  Add the remaining broth.  Stir to combine and simmer for 10 minutes.  Season with salt and pepper.  Stir in 1 cup coconut milk.

Ladle in desired amount of the soup into each bowl and top with the crispy chorizo.  Use the remaining coconut milk to garnish the soup.  Makes 8-10 servings.  

Note: If you like your chorizo extra crispy you can place the chorizo on a foil lined baking sheet and place under the broiler for a few minutes.  


Sunday, November 9, 2014

Super Green Salad

I've been making this salad for a while now and after many request I'm finally getting around to posting it.  It's made appearances at a bridal shower, birthday parties, dinner parties and most recently it was on the menu for my cooking day with a few of my dance kids.  This salad is always a hit and has been officially approved by a few anti-vegetable picky eaters!  I think it's the blueberries and sweet maple syrup that throw everyone off.  Suddenly they forget they are eating healthy and instantly enjoying this fresh hearty salad.  


This Thanksgiving my super green salad, as my dance girls were calling it, will be making it's way to the dinner table.  I'm hoping that it will help cancel out the over load of carbs and sweets I will be enjoying that day.  Also as an added bonus, all off the veggies and the dressing can be prepped and made the night before leaving you more time to get to those super indulgent side dishes and of course, a glass of wine or two!


Let the holiday season begin! 


Almond Blueberry Super Green Salad with Maple Dijon Dressing

Ingredients
1-1/2 cups Dino kale, chopped
1 cup red cabbage, chopped (you can substitute green cabbage)
1 cup Brussels sprouts, shredded
1 -1/2 cup fresh blueberries
1/2 cup sliced raw almonds
1/2 cup shredded Manchego cheese
1/4 cup fresh lemon juice
1/4 cup maple syrup
1/3 cup olive oil
1 teaspoon whole grain Dijon mustard
Salt and pepper

In a medium bowl combine the lemon juice, maple syrup, olive oil and Dijon mustard.  Whisk to combine.  Season with a bit of salt and pepper and set aside.  You can also combine the ingredients in an airtight jar and shake to combine.

In a large salad bowl place the kale.  Drizzle a bit of olive oil over the kale and massage the kale for about 1 minute.  Add the red cabbage and Brussels sprouts and toss to combine.  Add the blueberries, sliced almonds, and Manchego cheese.  Gently toss to combine.  Pour desired amount of dressing over the salad and toss.  Makes 4 servings.


Thursday, October 23, 2014

Dinner With Friends Via The Internet

This whole world of social media seems to always get a ton of grief with all of its negative comments and opinions.  While I am tired of the lack of privacy, over-sharing, bullying, and the total distraction from the real world I am forever thankful for the wonderful things that can be shared.  


I often talk about my best girlfriends from high school as they are constantly inspiring me, supporting me and secretly (and not so secretly) trying to persuade me to move back to the east coast.  All five amazing women lead extremely busy lives and between juggling their kids, work, homes, and businesses it's often difficult to catch up over the phone.  Thankfully we are able to share our lives with each other over Facebook, Instagram and blogging.  


After I had recently posted a picture on Instagram of this spicy fall pasta, I instantly got a comment from one of the "Hershey Husbands" asking for the recipe.  While I really wish I could have dropped off some for dinner, sending the recipe was the next best thing.  I have to say I really enjoy having some east coast taste testers!

So even with its negativity, social media has enabled us to share our lives with each other whether it's a new business venture, pictures of their kids picking pumpkins or my foodie creations.  I'm thankful for it!


Spicy Sausage and Roasted Delicata Squash Pasta

Ingredients
1 pound spaghetti pasta
1-1/2 lbs spicy Italian sausage links, casing removed and roughly chopped
2-3 medium delicata squash, seeded and cut into 1/2 inch pieces (you can substitute with 1 medium acorn squash)
7 ounces fresh arugula
3/4 cup plus 3 tablespoons olive oil
2 tablespoons lemon juice
1/2 cup panko bread crumbs
1 tablespoon fresh thyme, chopped
1/4 teaspoon plus some for seasoning salt
1/4 teaspoon plus some for seasoning pepper

In a medium skillet heat 2 tablespoons of olive oil over medium heat.  Add the panko bread crumbs and cook, stirring continuously, until golden brown.  Add the thyme and 1/4 teaspoon salt and pepper.  Stir to combine.  Transfer the panko mixture to a small bowl.  Set aside and allow to cool.

Preheat the oven to 400 degrees.

In a medium mixing bowl toss the chopped delicata squash with 1 tablespoon olive oil and season with salt and pepper.  Place the prepared squash onto a foil lined rimmed baking sheet.  Bake in the oven for 25-30 minutes, turning halfway through.


While the squash is baking, boil your water for the pasta in a large pot and cook the pasta according to the directions on the package.  Strain the pasta and return the pasta to the pot.  Add the 3/4 cup of olive oil and lemon juice.  Toss to combine.

While the pasta is cooking, drizzle a small bit of olive oil in a large pan and heat over medium heat.  Add the sausage and cook until browned and cooked through.  Use a spatula to break up the sausage into small pieces.  Pour the sausage into the large pot of cooked pasta and toss to combine.  Add the delicata squash to the mixture and gently toss to combine.  

Place about 1/4 - 1/3 cup arugula onto each plate.  Divided evenly, place the pasta mixture over top and toss.  Top with the thyme panko bread crumbs and serve.  Makes 6-8 servings.


Wednesday, October 15, 2014

Falling For Bourbon

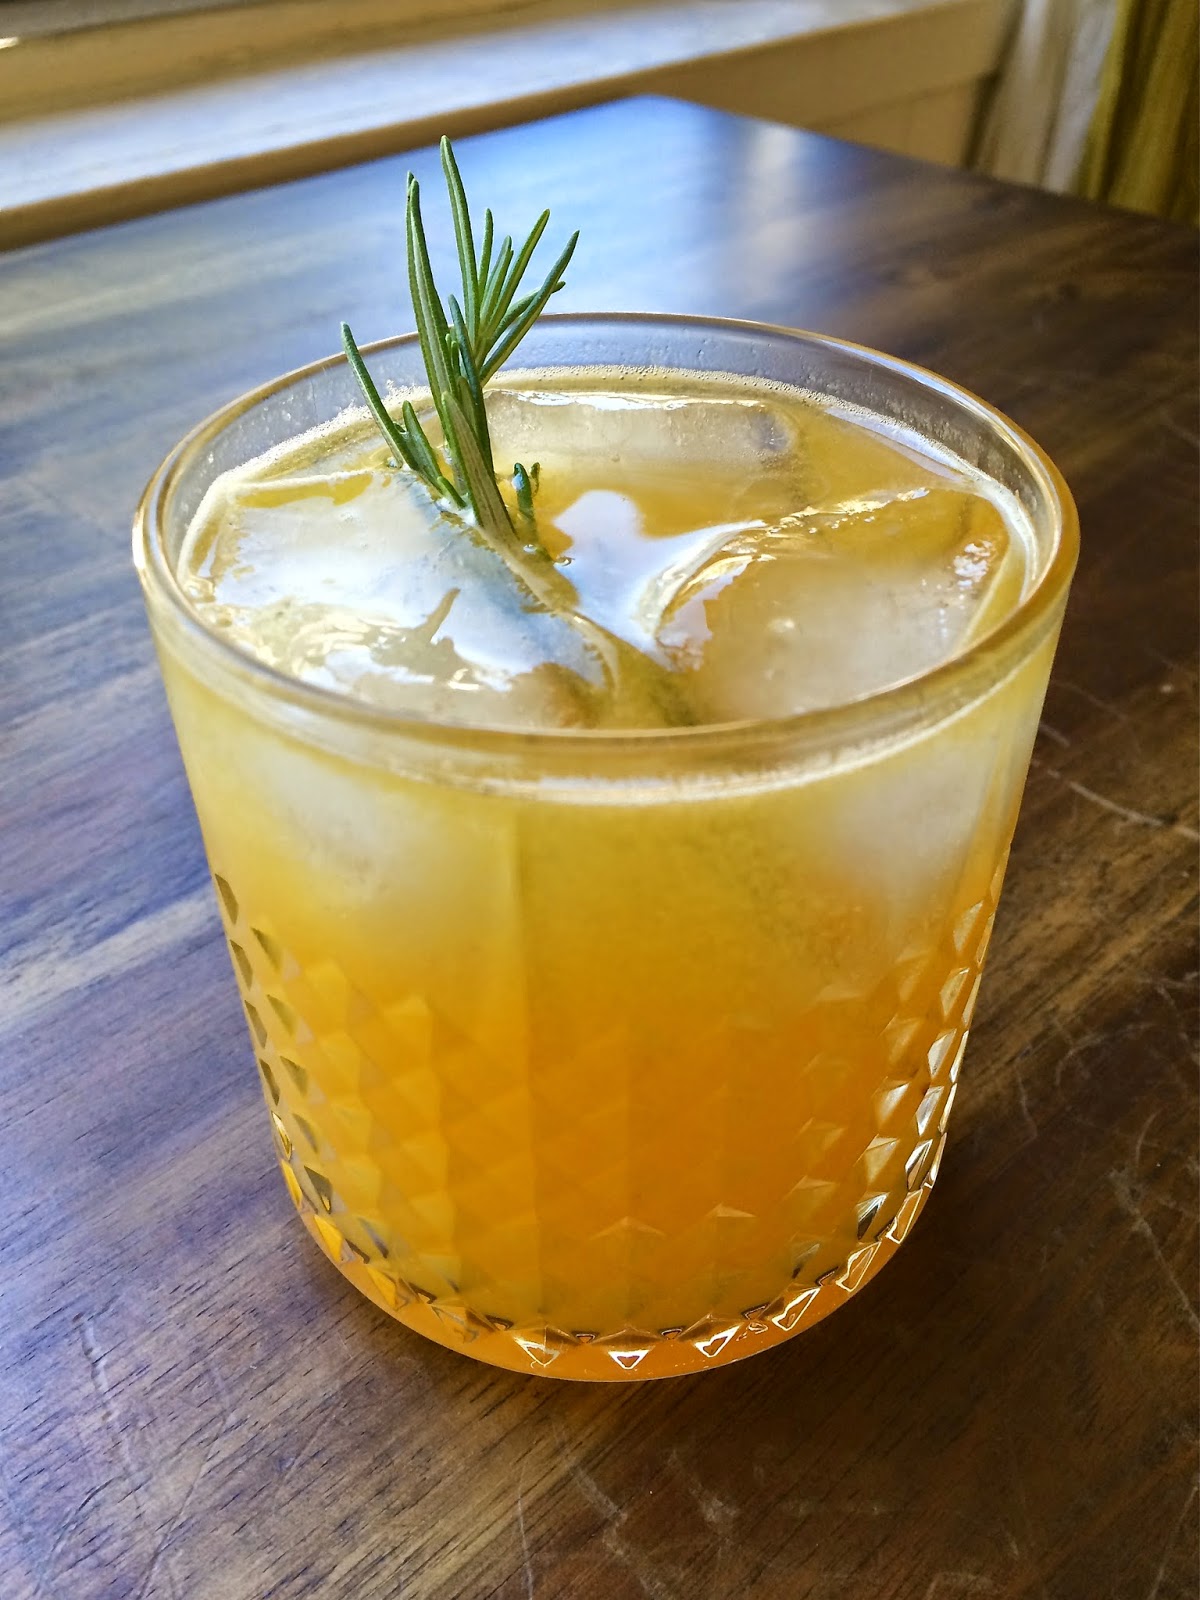
I know the title of this post is a bit cheesy but who isn't excited to start mixing up some fall cocktails with a great bourbon?  This recipe in particular was made with an outdoor fall brunch in mind.  You know, the kind where you are wearing the perfect sweater and scarf slowly sipping on a delightful cocktail to warm your belly while the beautiful autumn leaves fall from the trees.  OK we know that only happens in the movies or in the perfect world of Pinterest.  However, I do think that this herb infused cocktail should make it's way to your brunch table, Halloween parties, join you for a hayride and then bring the whole family together at Thanksgiving.  Cheers!


Orange Rosemary Bourbon Cocktail

Ingredients
2 ounces bourbon (I use Bulleit Bourbon)
2 ounces rosemary infused orange juice (see recipe below)
Soda water
Fresh rosemary sprig for garnish
Ice

Rosemary Infused Orange Juice

Ingredients
3 cups fresh squeezed orange juice (store bought OJ works too)
3 fresh rosemary sprigs

Place the rosemary sprigs into a clean air tight jar.  Pour the juice over the rosemary.  Store in the refrigerator and allow to infuse for about 2-3 days.  Remove the rosemary from the jar and discard.  The infused juice will keep in the refrigerator for up to 2 weeks.


Assembling the cocktail:

Fill a rocks glass with ice.  Pour the bourbon and rosemary infused orange juice over the ice.  Top off with the soda water and garnish with the rosemary sprig.  Makes 1 serving.


Thursday, October 9, 2014

Two Ingredient Ice Cream

OK I'm going to complain again for only one second that I can't turn on my oven during the day because of the weather.  Ugh!!  I have so many wonderful fall recipes that I'm hoping to share soon, before it turns winter!  So for now I will be doing some simple and fun recipes that doesn't require the oven.


I don't know if you've been to Trader Joe's lately and discovered that they have now made an ice cream with their super addicting Speculoos Cookie Butter.  Well unfortunately and fortunately I have.  I'm a sucker for trying out all of their new products and this one without a doubt jumped into my already overflowing grocery cart.  


My husband and I at first went slow and savored each bite of a small bowl declaring it is the best ice cream we've had in a while.  Then we decided it needed to be made into a pumpkin beer float, which was of course, incredible.  Then we found ourselves sneaking spoonfuls from the freezer and by the end of the week we were scraping the bottom of the carton not to leave any ounce of cookie butter behind.  Indulgent?  Maybe.  Feeling a bit guilty?  Yes.


To calm my guilty feelings and cookie butter cravings I decided to make my own version with just two  ingredients.  Yes, TWO ingredients!!  All you need is frozen bananas, cookie butter and a food processor to blend it until it makes that creamy delicious ice cream.  I admit it's not quite the same but it's definitely pretty darn good!  


Banana Cookie Butter Ice Cream

Ingredients
3 very ripe bananas, chopped and frozen 
1/4 cup Speculoos Cookie Butter, creamy or crunchy (substitutes: peanut butter, Nutella, chocolate fudge)

Place the frozen bananas into a food processor.  Blend until smooth.  Add the cookie butter and pulse until combined.  The texture will be creamy like soft serve ice cream.  You can enjoy immediately or place into an airtight container and place into the freezer for about 20-30 minutes until frozen.  Store in the freezer for up to 1 month.  Makes 2 cups.